")
By Kristin Arzt
The possibilities of what you can create with wax, fire, and molten metal are endless. Cast jewelry and sculptures from wax to capture fine details in your piece. Casting jewelry is cost and time effective, and it gives you the ability to make multiples of the same piece. Lost wax casting is an art form that humans have used for thousands of years to create unique pieces of jewelry. We have been pouring molten metals into cavities shaped in stone, plaster, sand, and even bone since the time we learned to melt metals.
Wax casting is not necessarily an art form that you can do on your own without proper guidance. Taking a class ensures safety under the guidance of a skilled instructor, and is more cost-effective than purchasing all of the necessary equipment. And, there is no prior experience necessary!
We jumped into a Casting Wax To Silver class to get the run-down on how it’s done. Cast Jewelry is not just for adults! We also offer it during our Youth Summer Camps.
Tools You’ll Need
- Prepared wax form to be cast
- Metal- your choice of bronze or silver
- Investment
- Flask
- 2.5” rubber base
- Rubber mixing bowl
- Volumetric flask for water
- Vacuum chamber
- Kiln for burnout
- Small round crucible for centrifuge
- Flux
- Small torch
- Safety gear: leather gloves, protective glasses
- Bucket with water
- Big steel tongs to pick up hot flask
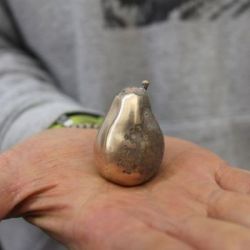
Step 1: Carve and Shape Wax
Carve your project in wax. Different types of wax can be used for your desired outcome. Sculpture wax is soft and can be shaped like clay, while some wax is harder and can be used to achieve textures in cast jewelry.

Step 2: Attach Sprues and Base
Attach sprues and weigh your wax model with the sprues attached. Melt wax onto the button of your flask base, and attach your wax model to the base.

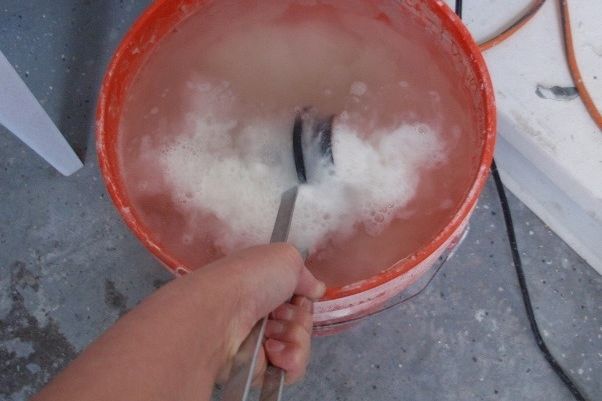
Step 3: Invest
Measure the ratio of investment powder to water based on the weight of your model. Add the investment to water and mix until smooth (think pancakes). Place the investment mixture in a vacuum chamber for about 30 seconds, then pour it carefully into your flask. Let it dry overnight.

Step 4: Wax Burnout
Place your flask in the kiln to remove the wax and prepare your flask for casting. Timing and temperature will be adjusted according to the size of your flask. Then, gear up! Put on your safety glasses and gloves before handling your hot flask.

Step 5: Casting
Lock the centrifuge, place your flask in the cradle, and push the crucible up against the flask. Preheat the crucible, then pour your pre-weighed metal into it. Using an oxy-acetylene torch, melt the metals in your crucible and occasionally stir with a stirring rod. When the metals are completely melted, unlock the centrifuge, activating it, and flood the molten metal into your flask. The centrifuge will spin for about one minute. Remove your flask from the cradle using tongs (it’s hot!).


Step 6: Quench
After your flask cools and is no longer glowing red, pick up your flask with a pair of tongs and completely submerge it in the quenching bucket until the bubbling stops. Try to keep your flask horizontal so your casting does not slip out and fall to the bottom of the bucket. Scrape the soft investment out of the flask and extract your casting.


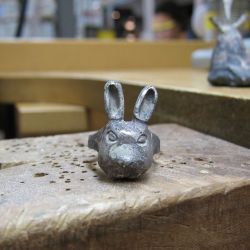
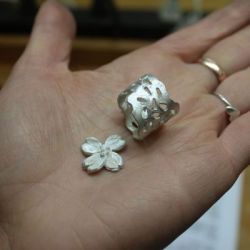
Step 7: Finishing Work
Cut off the sprues, grind down any sharp edges, sand, and polish your piece, and enjoy!


Keep reading…

April-June Classes Open For Members On February 6—Get Your Guide!
Get ready to make this spring! April-june classes open for Early Member Registration this Tuesday, February 6. If you haven’t secured your Crucible membership, now is the time....

Plan for a Creative 2024: January-March Classes Open 10/31
This Tuesday, October 31, over 150 January-March classes open for early member registration. 2024 marks The Crucible's 25th Anniversary and there's no better way to ring in a...

Check Out Your September-December Classes In Our Latest Member Guide
Are you ready to shape glass, forge metal, and mold clay this fall? September–December classes open this Tuesday, July 11 exclusively for Crucible members. And with more than 200...

It’s Officially 2023 Summer Camp Season–See All The Pics!
No corner of the imagination went unexplored during the first week of 2023 Crucible Youth Summer Camp. From friendly robots to glistening glass creatures, we were blown away by the...

Your Summer Plans Just Landed: July-August Class Guide
Summer is synonymous with good times, and what could be more fun than exploring a new creative hobby? This Tuesday, May 2, our July-August 2023 classes will open for early member...

Plan The Best Summer With Our 2023 Youth Summer Camp Guide
2023 Youth Summer Camp registration is nearly here. With so many offerings we thought you might like a little help finding the perfect fit for your kiddo. Behold, our 2023 Youth...