Glass Flameworking Glass
Guide to Glass Lampworking and Flameworking
By Kristin Arzt
Lampworking 101: Guide to Glass Lampworking & Flameworking
Guide to Lampworking and Flameworking
Glass lampworking is an art form that comes from thousands of years of history. It spans continents, from Africa to Asia to Europe, with many different traditions and skills. As recently as the last 50 years, lampworking has enjoyed a modern resurgence. It generally requires fewer tools and materials than other glass techniques, and you can create everything from decorative beads to small hollow vessels.

What is lampworking?
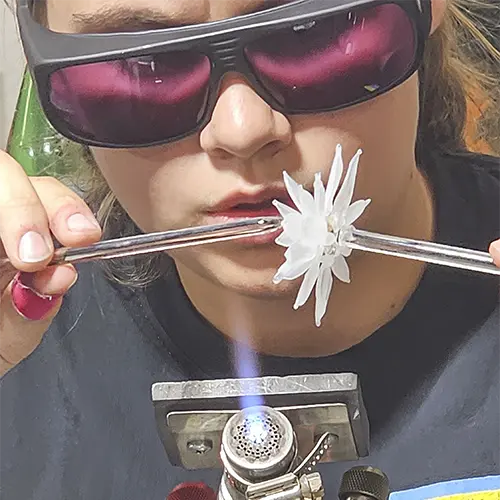
Lampworking is a type of glasswork that uses a torch to melt and shape glass. Once the glass is heated to a molten state, it is formed by blowing and shaping with tools and hand movements. It is also known as flameworking.
Lampworking vs flameworking
Essentially, flameworking and lampworking are the same. “It is more a matter of terminology,” Ralph McCaskey, Glass Flameworking Department Co-Head, told us. The term lampworking originated from when Venetian glassworkers used an oil lamp to heat their glass over. Flameworking is a more modern take on the term. Present-day glass artists primarily work with an oxygen-propane torch.

History of lampworking
Traditional glass beads, with the exception of Asian and African glasswork, hail from the Venitian Renaissance in Italy. It is believed that the oldest known glass beads date back to the fifth century BC. Lampworking became widely practiced in Murano, Italy in the 14th century. Murano was the glass bead capital of the world for over 400 years. Traditional bead makers used an oil lamp to heat their glass, which is where the technique gets its name.
Traditional oil lamps in Venice were essentially a reservoir with a wick and a small tube made from rubbered or tarred fabric. Bellows under the workbench were controlled with their feet as they worked, pumping oxygen into the oil lamp. The oxygen ensured that oil vapors burned more efficiently and directed the flame.
About thirty years ago, American artists began exploring modern glass lampworking techniques. This group eventually formed the basis for the International Society of Glass Beadmakers, an organization dedicated to the preservation of traditional techniques and promotion of educational initiatives.

Lampworking techniques
There are many different techniques that you can employ at the torch when you begin lampworking. Here, we will cover everything from the absolute essentials like a lamp-wounding, to ornamental skills like marvering.
Technique 1: Hollow work
Hollow work is used to create vessels, hollow beads, and other forms. There are two ways to approach hollow work when flameworking. You can either start with hollow tubing and heat to reshape it into your desired form, or make a small steel blowpipe and build the neck of the vessel right on the tube with a hot gather of glass.
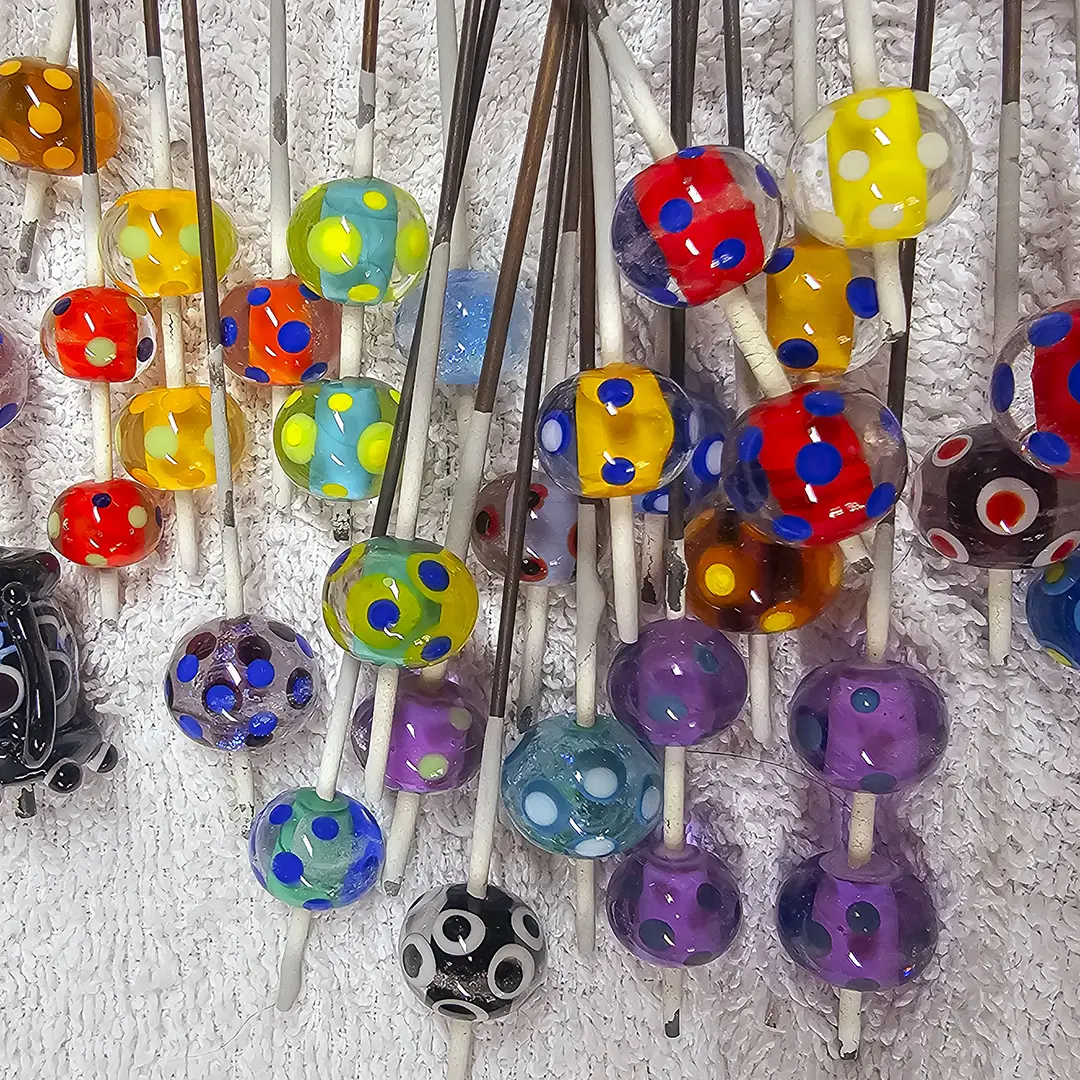
Technique 2: Lamp-wound work
The lamp-wound or bead-wound technique is essentially creating a bead by winding the glass around a mandrel, using heat from the torch and gravity. Bring your glass up to a temperature high enough to make it workable and wind it around a mandrel that has been coated in bead release. Many glass artists also work off the mandrel, holding the glass rods themselves and heating the tip until it is workable. The first marbles that students make in The Crucible’s Glass Flameworking I are known as “gravity marbles.” Students simply use a torch to heat their glass and gravity to keep the glass moving and shape a marble.
Technique 3: Marvering
Marvering is a technique of shaping your glass while it is hot by manipulating it with various tools made from graphite, wood, stainless steel, brass, tungsten, or marble tools, and paddles. While your glass is still hot, or after reheating, you can decorate the surface with stringers. The term originates from the French word “marbrer” which translates to “marble”.

Technique 4: Casting
Glass can be cast by simply pressing it into a mold in its molten state. The Bohemian glass industry was known for its ability to copy more expensive beads and produced mass-produced molded glass.
Technique 5: Pulling a Stringer
Stringers are essentially threads of glass that are pulled over the flame of your torch from re-melted sheet glass. First, warm up your glass over the torch to make a gather at the end of the rod. When your gather is hot, use needle-nose pliers or tweezers to pull the gather out into a stringer. Start by pulling slowly, and as it cools pull faster. You can also adjust the width of your stringer by how fast or slowly you pull.
Technique 6: “End of Day Bead”
Venitian bead makers would end the day with shrapnel and glass frit all over their workbench. At the end of their workday, they would clean up their bench by heating up some inexpensive glass and rolling it over the frit on their bench. This would melt it all together, creating a perfectly unique and colorful bead known as the “End of day bead.”

7 steps to lampworking
Before you go to use the torch, make a plan for your project, and have an understanding of what steps will come next. When working with glass, you need to work quickly while the glass is hot. At The Crucible, we have our students write down (or draw) the steps of their project on a small whiteboard to reference while they are working on the torch. Sketching out the steps of your projects will ensure greater success. Do not write out the steps of your project on anything flammable, like paper!


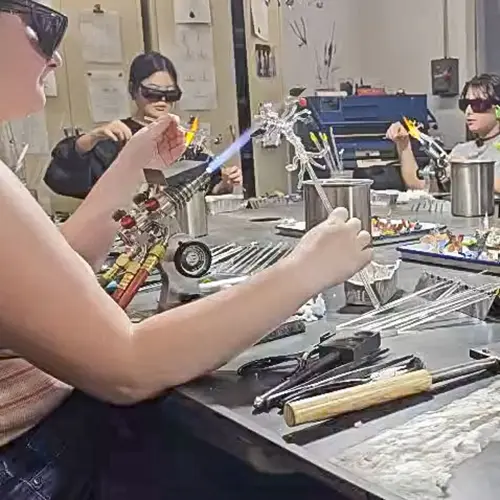
Learn lampworking at The Crucible
Using the intense heat of an oxygen-propane torch, you can learn how to melt and shape borosilicate or soft glass in The Crucible’s Glass Flameworking Department. You will create beautiful and interesting pieces including beads, marbles, small sculptures, and hollow vessels. We offer a range of flameworking classes, from learning the fundamentals to more advanced bead making, for both adults and youth. If you’ve ever wanted to learn the beautiful art of flameworking, look no further, see upcoming classes here.
denis_downshift_labs")
Lampworking FAQs
What can you make lampworking?
Lampworking is used to create both artwork and practical objects. Ornamental lampworking projects include beads, small sculptures, marbles, small vessels, and more. It is also used to create scientific instruments.
What kind of glass do I need for lampworking?
There are a few different types of glass used in lampworking, and your project will determine what type of glass you want to use.
Soda-lime glass is the most popular type of glass and also the original formula used in traditional Venetian glass. It is also known as "soft glass."
Borosilicate glass is a very hard glass that requires greater heat than soft glass. It was discovered by German glassmaker Otto Schott in the late 19th century when heading boron to the soft glass formula. Pyrex is the most commonly used borosilicate glass. It is an easier glass to learn with as it stays harder during the flameworking process. For beginning students, the fluidity of soft glass can present a challenge when learning on the torch.
How are lampwork beads made?
To make lampwork beads, you will need to melt down a narrow rod of glass over a torch. When the glass is molten, you can easily wind it around your mandrel using gravity as you twist the mandrel. The hole in the bead is formed by the space taken up by the mandrel. You may choose to marver or embellish your glass using various tools. After you are happy with the decoration, you will anneal and coldwork your glass bead. Final step: String your beads and wear with pride!
Continue Exploring Guides In Glass

Guide To Enameling: Learn Different Types & Techniques for Enamel Art
Learn the essential common enameling techniques, how to start, and what you create with enameling, from jewelry to bathtubs!...

Glass Casting 101: Process and Techniques
Learn how to create molds and cast your own glass work of art. Get the inside scoop from our Glass Casting & Coldworking Department....

Guide To Vitreous Enamel Vitreous Enamel 101: Definition, Process, & How To Learn
Learn vitreous enameling by fusing glass to metal at high heat, and enamel everything from from precious jewelry to industrial bathtubs!...

Glass Fusing Guide | Fused Glass Explained
Learn exactly what tools and supplies you need to start fusing glass. Get the inside scoop from our Glass Fusing & Slumping Department....

Guide to Glass Slumping: How to Slump Glass in 5 Steps
Learn exactly what tools and supplies you need to start slumping glass. Get the inside scoop from our Glass Fusing & Slumping Department....

Lampworking 101: Guide to Glass Lampworking & Flameworking
Learn exactly what techniques you to learn and how to start lampworking. Get the inside scoop on our Flameworking Department's favorite tips....
You Can Learn To Flamework Glass
The Crucible has new glass lampworking classes offered weekly.

3-Hour Taster: Glass Flameworking
3-Hour Tasters are a great way to explore a new art form without the deeper commitment of a full course. After a basic introduction to melting and shaping borosilicate glass with...

Glass Flameworked Ornaments
After a refresher on melting and shaping borosilicate glass with an oxy-propane torch, create elegant, icicle-inspired ornaments or miniature candy canes ideal for holiday gifting...
Glass Flameworking I
Create beautiful glass ornaments, pendants, marbles, and more! Learn how to use tools and equipment like an oxy-propane torch to melt and shape glass. We will cover a variety of...
Glass Beads II
This intermediate class explores new bead making skills, tools, and materials. Shape beads into hearts, flowers, or animals. Experiment with new techniques, including drawing with...

Adventures In Soft Glass: Finding Your Inner Monster
Extend your glass experience by learning techniques in creating open hollow forms. Monster expert Ralph McCaskey takes you on a journey in soft glass sharing secrets to creating...

Beginning Marbles
Create nature?s most perfect form?the sphere?in glass! After a basic introduction to melting and shaping borosilicate glass, you will complete several marble designs, including the...

Glass Flameworked Pendant
After a basic introduction to melting and shaping borosilicate glass with an oxy-propane torch, create elegant, organic and beautiful pendants for holiday gifting or for your own...
Glass Flameworking Lab
Lab sessions are a great benefit, exclusively for Crucible members! Practice the skills you learn in class and explore new possibilities with your craft. No instruction is provided...

Glass Flameworking II
In this intermediate course, we expand on the fundamentals and investigate the intricacies of borosilicate glass flameworking in more involved projects and contemporary designs. In...


Advanced Marble Making Techniques
The magical world of glass marble making continues in this course for the enthusiast. Explore advanced techniques, such as color, depth, texture, organic detail, murrine and cane...

Glass Dragons
Develop your sculptural skills on an oxy-propane torch transforming borosilicate glass. Using the dragon?s own breath?fire?you will make wild and wonderful dragons of all colors...

Glass Hearts
Open your heart to borosilicate glass, while making unique glass hearts in a variety of colors. Using an oxy-propane torch, students will shape glass into pendants and light...

Glass Beads I
Learn to make colorful glass beads from Effettre glass rods (a soft glass) using an oxy-propane torch. This class teaches you how to make a variety of bead shapes, introduces tools...
Glass Flameworking Lab – 1 Day
Lab sessions are a great benefit, exclusively for Crucible members! Practice the skills you learn in class and explore new possibilities with your craft. No instruction is provided...

Youth Glass Flameworking II Immersion
Dive deep in this continuing level youth workshop. In this weeklong class, students will expand their skills and techniques for working with borosilicate glass flameworking. Create...

Adventures in Soft Glass: Fabulous Fish
This intermediate-level class will have you sculpting fabulous solid and hollow-bodied fish. Emphasis will be on both structural and delightful decorative glass flameworking...

Glass Sea Shells
Explore the underwater world of sea shells with borosilicate glass. Using an oxy-propane torch, students will sculpt shells in both natural and adventurous color ways....
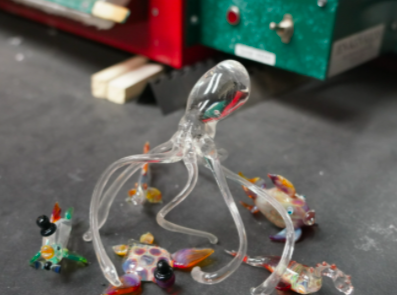
Glass Sea Creatures
Explore the underwater world of sea creatures with borosilicate glass. Using an oxy-propane torch, students will sculpt octopus, shells, fish, and starfish! PREREQUISITE: Glass...

Glass Flameworking Lab (12 hour)
Lab sessions are a great benefit, exclusively for Crucible members! Practice the skills you learn in class and explore new possibilities with your craft. No instruction is provided...

Youth Soft Glass Beads
Learn to make colorful glass beads from Effettre soft glass rods using an oxy-propane torch. Youth will make a variety of bead shapes, stringers, and twistees and build skill using...

Youth Glass Beads, Bugs, and Monsters!
Students will be taken on a journey to explore colorful glass beads, bugs, and monsters with crazy eyes and wacky facial expressions, using an oxy-propane torch. We will cover bead...

Youth Tiny Wild Things
Students will create colorful glass beads, expressive figurines, and creatures with unique features using an oxy-propane torch and soft glass. We will cover bead surface patterns,...

Eggs!
Create Easter Eggs?in glass! After a basic introduction to melting and shaping borosilicate glass, you will complete several egg designs, including the clear gravity marble, the...
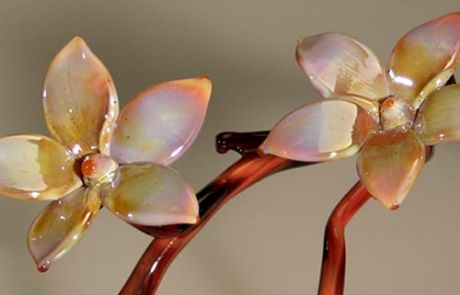
Duplicating Nature
Bring the beauty of the natural world into your glasswork. In this course, you?ll learn to twist, shape, and manipulate molten glass into lifelike flowers, delicate branches,...

Youth Glass Flameworking II
Expand your skills and techniques for working with borosilicate glass flameworking in this intermediate class. Create complex marbles, detailed sculptures, implosion pendants, and...