LeatherEarth
Leatherworking 101: A how-to guide to learning leather crafting
By Kristin Arzt
Leatherworking 101: A how-to guide to learning leather crafting
Leatherworking 101: A how-to guide to learning leather crafting
Leatherworking is a great skill to pick up to make everything from practical projects to ornate artwork. The start-up costs are relatively low, and the basic techniques are easy to pick up on and apply to more advanced projects. Leather is used to make a variety of objects, including footwear, car seats, clothing, footballs, backpacks, purses, books, furniture, and more. Here, we will cover exactly how to get started leatherworking and what you need to set up.
What is leatherworking?
Leatherworking, also known as leather crafting, is the practice of making leather into practical objects or artwork, using molding, dyeing, carving, stamping, and fabrication techniques.
Starting with the basics of leatherworking
Once you start leatherworking, you will be able to apply basic knowledge and techniques to a vast number of projects. The tools for leatherworking are relatively inexpensive, long-lasting, and versatile for many different projects.

Common leatherworking tools
| Leatherworking Tools | What are they? |
|---|---|
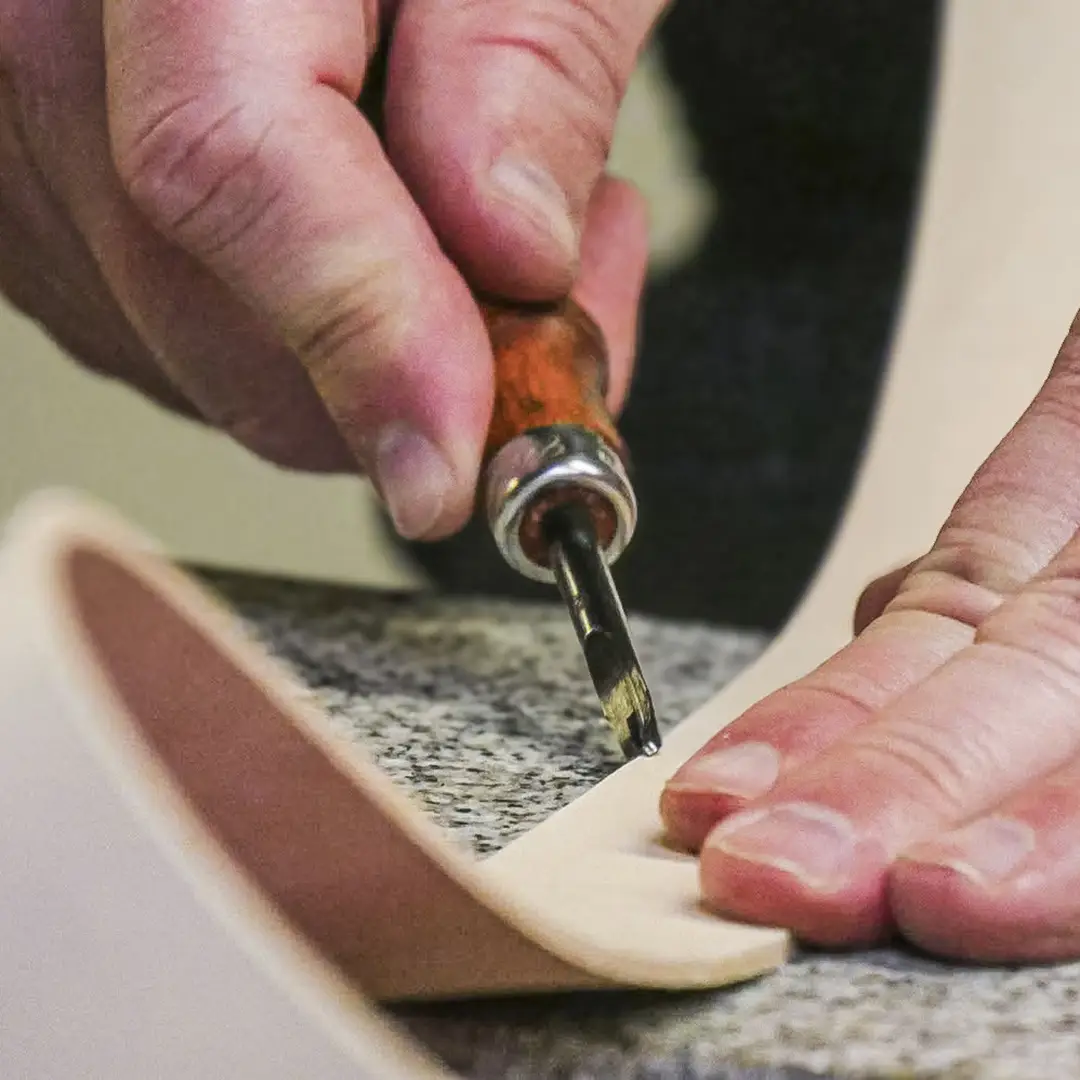
| Awl | An awl is a tool with a metal point used for marking, piercing, punching, or sewing leather. |
| Beveler | A beveler is a tool with a metal blade that is used to remove the square corners from the edges of leather goods. |
| Burnisher | A burnisher is used to smooth and harden the edges of leather. It is usually made of wood and smooths leather through applied friction and pressure. |
| Cutting tools | There are many different tools you can use to cut leather, and the right one will depend on the project you have in mind. You can use a strap cutter to cut straight lines and pull straps or a rotary cutter to slice curves. |
| Leather glue | Make sure you are using glue that is specific for leather and suede. |
| Maul | A leather maul is a striking tool used for stamping, tooling, setting rivets, and more. It is made of a head and a handle, similar to a hammer and mallet. |
| Pricking iron and chisel | Pricking irons and chisels are tools that are used for marking and creating holes in leather. They are built with equally spaced metal points. |
| Punch | A leather punch is a hole punch specifically for making holes in leather. They are great for setting rivets or making holes in belts and collars. |
| Skiver | A leather skiver is a metal tool used to remove and shave thin layers of leather material off of the surface. |
| Stamp | Leather stamps are made of metal and are used to create designs on your leather’s surface. |
| Sewing tools | You will need to gather needles, thread, and tools to hold leather while you sew when sewing leather. |
| Cutting mat | Before cutting your leather with a utility blade or rotary cutter, set up your work surface with a cutting mat to protect the table. |

Types of leather
Sourcing leather for crafting
The Crucible’s Leatherworking department sources leather from Tandy Leather, a specialty retailer and wholesale distributor of leather, tools, and supplies.
Preparing your leather
Lay your out on a table leather and examine the surface. Make sure you avoid any holes or uneven areas when you decide which area of the leather to work with. Measure and mark the surface before you cut your leather. You can measure your project out by working with a pattern as a guide. When marking cut lines, you can use a pencil or chalk.
Cutting your leather
You can cut leather several different ways, and the method and tools you choose will depend on the project. For thinner, more pliable leather, you can simply use scissors or leather shears. Shears are great for freeform cutting and following templates. Utility knives are very versatile and inexpensive tools. They work well for curves and for cutting straight lines with a straightedge. If your project is a belt, collar, or requires any straight lines, a strap cutter will be an ideal cutting tool.

Leatherworking skills and techniques
The following techniques can be applied to something as simple as a keychain or as large as a backpack. Once you are generally familiar with these skills, it is relatively simple to build upon basic techniques and elevate them to more advanced projects.
Gluing leather
Gluing leather is generally a straightforward process to fuse multiple leather pieces using glue specifically for leather and suede. Make sure you are working in a well-ventilated area when working with leather glue. You may want to rough or scratch the two surfaces that will be glued together for the best results, especially if they are very slick surfaces. Before you apply the glue, make sure the surface of the leather is clean and dry. When you apply the glue, use a thin and consistent layer of clay. Join the two pieces together and apply firm pressure as the glue is drying. Leave it undisturbed for at least three hours as the bond forms.
Casing leather
Casing is the process of adding water to veg tanned leather to soften the fibers. Veg tanned leather is in a natural, raw state, enabling you to easily case the fiber to stamp, mold, and shape the leather.
Saddle stitching leather
Saddle stitching is a very strong hand-sewn stitch, used to join two pieces of leather together. To saddle stitch, you will need to have a length of waxed thread and two harness needles. To create each stitch, the entire thread serpentines two times through the layers of leather, making it very durable and strong.

Dyeing leather
Leather can be dyed any color, and this process works particularly well on veg-tanned leather. You can apply your dye with sheep wool. If you are looking to get even coverage, use multiple light coats of pigment. If you are interested in an uneven, textured look, apply a few heavy coats of dye.
When selecting your dye, you have a few options. Spirit-based dyes are great for deep penetration of the leather. They are the best for getting uneven and rustic looks to your work. However, spirit-based dyes are not as easily available as others, and cannot be purchased or mailed to California. Acetone-based dyes are the California-friendly version of spirit-based dyes. They work reasonably well but evaporate very aggressively. Make sure you work quickly and seal your bottles tight. Water-based dyes work more like paints. They will only rest on the surface with minimal penetration. Water-based dyes come in the widest array of colors and are the only way to get very bright results. These dyes are ideal for projects that don’t see much bending or folding and are rarely exposed to the elements.
Burnishing leather
Burnishing leather is the method of polishing rough edges. It can be a time-consuming process but results in excellent, clean results. Start by beveling the edge and pre buffing the edge with a damp piece of cloth. Buff the edge using a slicking wheel or rod, until it takes on a glossy look and is smooth to the touch.
Skiving leather
Skiving leather reduces the thickness of the leather so that you can easily make folds, bends, and hide seams. A leather skiver is a metal tool used to remove and shave thin layers of leather material off of the surface. It generally improves the overall quality and appearance of the leather project.

What can you make with leather?
There are a limitless number of possibilities when you are starting to plan out leather projects. Ideal beginner projects, like a card wallet or a keychain, show you techniques that you can continue to apply to more complicated pieces, like bags, purses, and even bike seats.
How to learn leather crafting
The Crucible’s Leather, Textiles, and Fine Art Department offers leatherworking classes for all levels. You can make your own leather journal or card wallet in just a few hours in one of our 3-Hour Tasters. If you are interested in diving deeper and making larger projects, explore our intensive Leather Working classes.
Leatherworking FAQs
Is leatherworking hard to learn?
It is relatively easy to get started leatherworking. Setup costs are low and the basic skills are easily translatable to many different projects. You can easily make a simple wallet in just a few hours, or spend weeks on a more complicated project.
What are good beginner projects for leatherworking?
A simple card wallet is a great beginning leatherworking project, as it teaches the basic skills of preparing cutting, casing, dyeing, stitching, beveling, and burnishing leather. Leatherworking techniques tend to build upon each other as you scale up to make larger projects. Other simple beginner leatherworking projects are a pet collar, keychain, and belt. After making a simple project, you can apply all of these skills to more advanced projects, like a harness, backpack, or even a soccer ball.

Continue Exploring Guides In Earth

Guide to Ceramic Wheel Throwing
Learn exactly what tools and supplies you need to start wheel throwing pottery. Get the inside scoop from our Ceramics Department....

How To Make Pottery At Home: Materials, Equipment, & Steps
There are many different types of pottery and ways to learn ceramics. Here, we outline different types of clay and how to learn ceramics....

How To Glaze Pottery: Guide To Ceramics Glazing | The Crucible
This step-by-step guide covers how to glaze ceramics in a traditional and DIY kiln, along with different types of glazes and their uses....

Guide to Ceramics: Types, Materials, & How-To Learn
There are many different types of pottery and ways to learn ceramics. Here, we outline different types of clay and how to learn ceramics....

Guide to Handbuilding Pottery
Learn exactly what tools and supplies you need to start handbuilding pottery. Get the inside scoop from our Ceramics Department....
You Can Learn To Work With Leather
The Crucible has new leatherworking classes offered weekly.

3-Hour Taster: Leather
3-Hour Tasters are a great way to explore a new art form without the deeper commitment of a full course. Cut, fold, and sew a 6″x9″ personal bullet journal, then make...

Indigo Dyeing and Shibori
Learn to create unique patterns on fabric using shibori techniques and natural indigo dye. You will use folding, tying, and binding resist techniques to dye four cotton napkins and...

Mexican Tin Ornaments
Create unique tin ornaments inspired by repujado and hojalata from Mexico! Learn techniques for tooling aluminum, a malleable form of tin, while working with available designs and...

Contemporary Embossing
Embossing is the process of raising the two-dimensional surface of a design to give it varying degrees of depth, an effect that can’t be achieved in painting, drawing, or printing....

Leather Working I
Learn techniques for working with leather, including cutting, edging, stitching, dyeing, and oiling. We will cover design, setting rivets, adding hardware like buckles, and safety...

Bookbinding
In this course, you will learn the art of bookbinding, to create beautiful personal books for capturing memories, ideas, drawings, and more. We will focus on the foundation of...

Youth Mexican Tin Art
Learn how to create tin art inspired by repujado and hojalata done in Mexico. After a brief history of the tradtional cultural practice and demonstration of techniques, emboss your...
Youth Paper Sculpture
Learn cartonería, the ancient and popular art form of Mexican paper-mâché. Cartonería combines Aztec styles with Spanish techniques and is deeply rooted in ancient Mexican legends,...


Youth Leather Working II
Apply and build upon basic leatherworking techniques to create a unique leather project of your own design and pattern. From selecting materials to developing a pattern, students...

Bundle Dyeing
Learn the beautiful art of bundle dyeing with plants! In this class, you will gain an understanding of how to work with natural dyes as you explore the process of bundle dyeing. We...

Pet Collar and Tag
Calling all pet lovers! Learn to cut, edge, and dye leather, then set rivets and add a buckle to your pet’s new dashing collar! Once the collar is complete, take it over to...

Mordant and Indigo Dyeing
Learn to make a rainbow with natural dye! Cover the fundamentals of natural fibers, mordanting (fabric pre-treatment), and immersion dye baths with red madder root and yellow weld....

3-Hour Taster: Framed Milagros
Design and fabricate framed Milagros inspired by traditional Mexican artwork and iconography. Create metal imagery like hearts, hands, and nature honoring the special moments in...

Cartoneria: Mexican Paper Sculpture
Learn cartonería, the ancient and popular art form of Mexican paper-mâché. Cartonería combines Aztec styles with Spanish techniques and is deeply rooted in ancient Mexican legends,...

Festive Embossed Cards
Create a set of fifteen festive holiday cards through embossing and watercolor! Students will learn to emboss using a traditional press, exploring various materials, and utilizing...

Mexican Tin Nichos
Nichos, a folk art tradition popular throughout Central and South America, are a popular way to honor and remember loved ones with a three-dimensional or recessed display box....

Leather Working Lab
Lab sessions are a great benefit, exclusively for Crucible members! Practice the skills you learn in class and explore new possibilities with your craft. No instruction is provided...

Youth Natural Dyeing
Students will gain an understanding of the history of Natural Dyeing and Shibori, while also completing multiple projects using a number of fascinating techniques. We will be going...

Youth Print Making
Get an introduction to the wonderful practice of printmaking through cartography, relief, and monotype print! Youth will learn how to prep, design, pull and curate their prints...
Youth Relief Printing
In this beginner printmaking course, students will learn basic forms of relief prints methods and techniques! Through linocut and woodcut processes, youth will walk away with a...

Youth Print Making Weekend
Get an introduction to the wonderful practice of printmaking through cartography, relief, and monotype print! Youth will learn how to prep, design, pull and curate their prints...
Leather Holiday Ornaments
Usher in the holidays by creating hand-stamped and dyed leather ornaments in this introduction to leather tooling workshop. No previous experience necessary. All families welcome!...
3-Hour Taster: Print Making
3-Hour Tasters are a great way to explore a new art form without the deeper commitment of a full course. Learn introductory printing skills to make cards and more. Take a Taster...
3-Hour Taster: Leather Belt
Have a vintage or thrifted buckle in need of a belt? Come make your own unique leather belt by adding texture, color, and shine. Buckles up to 2in can be accommodated or basic...

Leather Wallet
Learn introductory techniques for working with leather, including cutting, stitching, dyeing, and stamping. Students will cut, fold and sew their own pocketed bi-fold wallet and...